How to Clear Your Web Browser Cache
If you own a website or offer website customer support, you’ve probably heard the words “browser cache” before. Website developers making changes to your website ask this frequently. Sometimes you’ll be asked to “clear or delete” your browser cache to see new changes made to your website. But what does clearing this mysterious cache mean, and what does clearing the browser cache affect?
What’s a Browser Cache?
By definition, “caching” means “storing something for future use” behind the scenes. A browser’s web cache does this with program and website assets. It keeps track of the assets and elements of the page. As the page downloads to your web browser, it stores things like images, HTML code, CSS, and Javascript on your computer.
What’s happening here is the web browser is storing static assets that don’t change often. These saved assets improve the time and bandwidth needed for future visits. As a result, the web browser doesn’t waste time re-downloading static pieces of the site. The resulting web browsing experience is faster.
Why is Browser Caching a Good Thing?
A web browser communicates with the servers that host websites. It acts like a traffic cop directing what text, images, and code do and what order they load. For large pages, this process takes time and uses bandwidth.
When a browser stores items that don’t change very often, the result is a faster browsing experience and better performance each time a visitor returns to the same website. Business owners with e-commerce sites can appreciate this because they know that slow download times hurt online sales and rankings on search engines.
Sometimes Browser Caching is a Nuisance
If you’ve ever worked with a web developer making significant changes to your website, you’ve likely had to clear your web browser’s cache before. And you’ll find they ask this a lot. Why? Clearing the browser’s cache is many times called a hard refresh. It’s a way of deleting the stored away assets of a web page and forcing it to load the most current version of the page. Web developers want you to see their latest changes. They’ll ask that this be done before editing or reviewing changes to a website.
How do you clear the web browser cache?
It doesn’t matter if you’re a website owner or website developer. The method for deleting the browser cache differs depending on what web browser you’re using. Below are the steps for many popular web browsers used. We have included a Web Browser Cache Clean Cheatsheet at the end of this article that you can use wherever you browse the web.
For Google Chrome Users
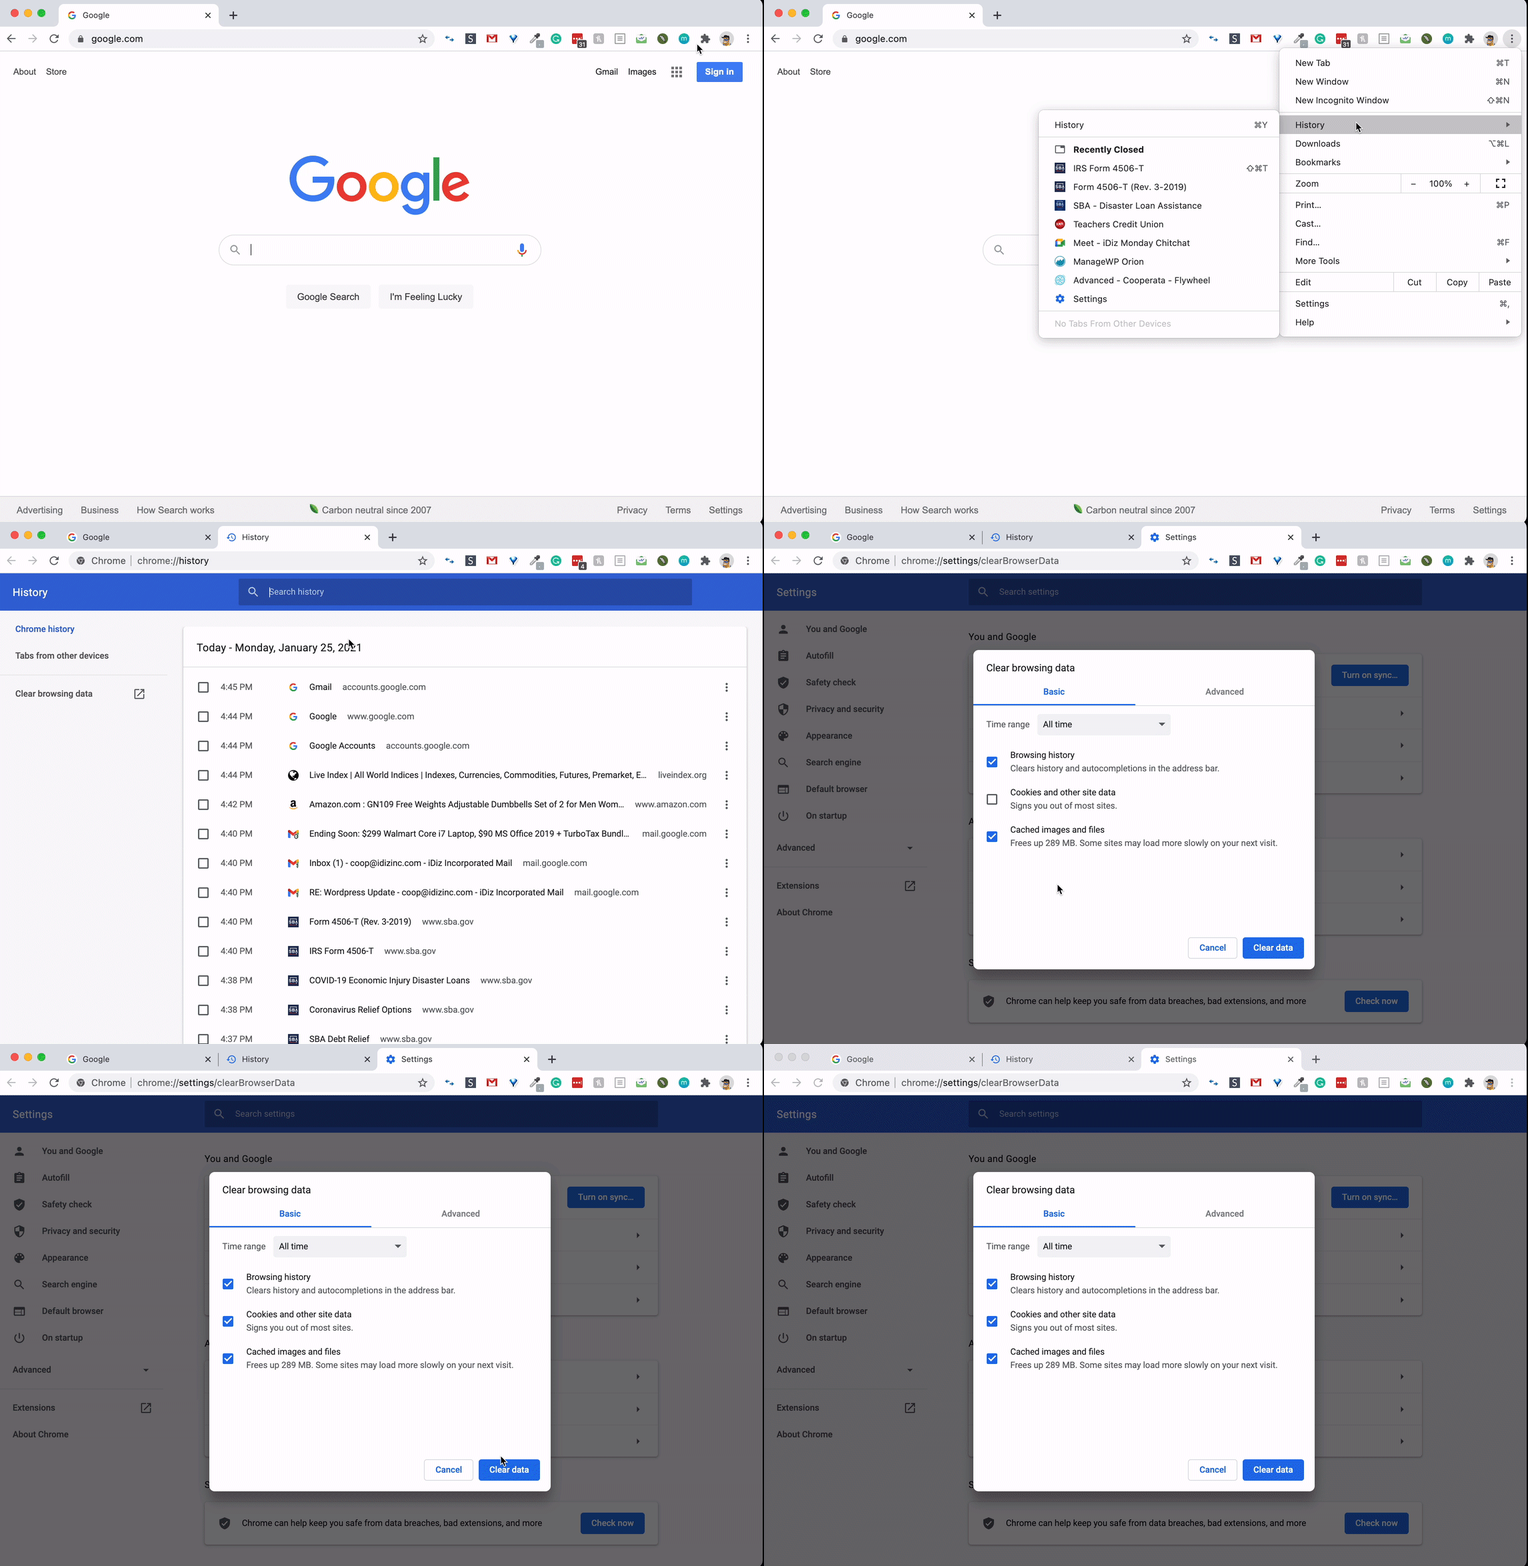
- Click the Tools menu, which looks like three dotted lines.
- Select History tab.
- Select the Clear Browsing Data tab from the left-hand side and select the Time Range setting to the All Time. At this point, you’ll need to check-mark Cookies and other site data and Cached images and files and select Clear Data.
- On a Windows computer, exit and reopen Chrome to save your changes. If on a Macintosh, go to the Chrome menu on the top menu bar and select Quit for the changes to stick.

For Firefox Users
- First, click on the Tools bar that looks like three stacked lines.
- Click on the Options menu item (On Mac, it’s labeled Preferences).
- On the menu to the left, select the Privacy & Security button.
- Under the Cookies and Site Data options, click the “Clear Data button that appears on the right.
- By default, the two checkboxes appear selected. Make sure those options are selected and click the clear button.
- If you’re on a Windows PC, close and reopen Firefox to make your changes stick. If you’re on a Macintosh, the same operation applies. Quit Firefox and reopen.

For Apple Safari Users
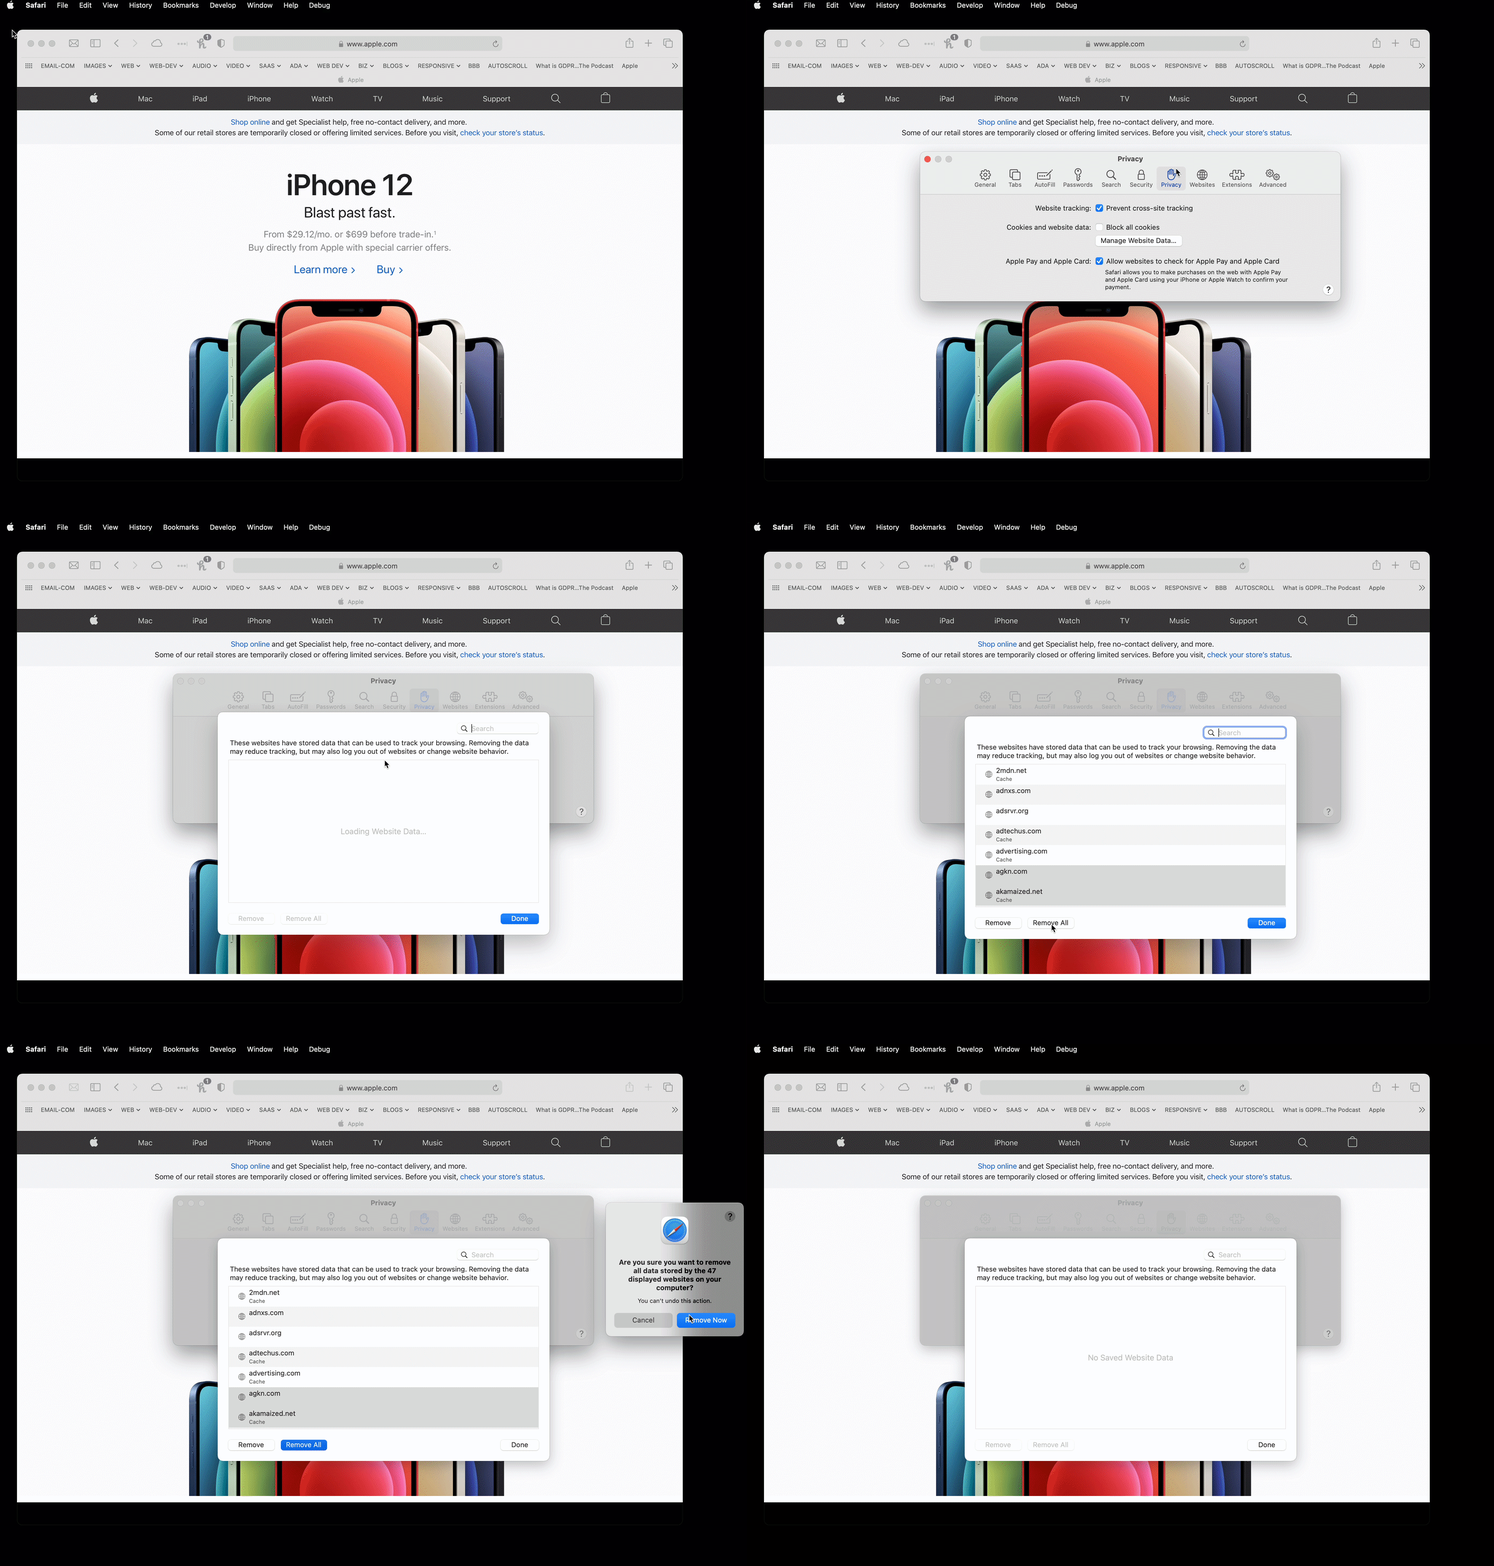
- Click on the Safari menu bar in the top left of the screen.
- Select the Preferences menu item.
- Next, select the Privacy tab that appears in the window.
- Click the Manage Website Data button.
- Select the Remove All option at the bottom.
- Click Remove Now to clear all data stored in Safari.
- Lastly, quit Safari to ensure your changes are saved and reopen the browser.

For Microsoft Edge Users
- Click three dotted lines in the upper-right corner, and open the Settings menu that appears.
- Select the Privacy, search, and services options on the left side.
- Under Clear browsing data, select the option Choose what to clear.
- For the next step, select the Cookies and other site data and the Cached images and files options that appear.
- Now select the Clear Now option.
- Quit Microsoft Edge to complete your changes. Reopen as needed.

For Internet Explorer Users
- Navigate to and select the Settings menu in the upper-right corner of the web browser window.
- Next, choose the Internet options.
- Underneath the General tab on the upper-left-hand side, scroll down to the Browsing history option.
- Select the Delete option.
- Next, select the Temporary Internet files and website files, Cookies, website data, History, and the Download History box options.
- Select and click Delete.
- Quit Internet Explorer and reopen it for changes to take effect.
For iOS Safari Users
- First, go to the Settings app located on your iPhone or iPad.
- Scroll down to the Safari menu option.
- Find and choose the Clear History and Website Data option.
- A modal pop-up will appear checking that you want to delete the History and Data. Select Clear History and Data.
- The Clear History and Website Data button turn gray when the cache and cookies are gone.
For Google Chrome iOs Users
- Open Google Chrome on your iPad or iPhone.
- Select and click on the menu toolbar in the bottom right corner of the browser window.
- Select the Settings options.
- Select the Privacy option.
- Next, the Select Cookies, Site Data, and Cached Images and Files option. Near the top, select the Time Range and set to All Time.
- Click Clear Browsing Data at the bottom of the screen.
- Then confirm by clicking Clear Browsing Data again.
We hope this guide helps you wrangle control of your web browsing experience. Feel free to bookmark this page for future reference, or you can download our handy cheatsheet.


